BFF
Control Loader software

Configuration Manager - new
with the V1.3 release |
BFF CL Software User Guide - Contents (For V1.3 +
Configuration Manager)
1. Introduction
& Installation
2.
FFB Configuration Settings
3. Operation
4.
Force Tuning
5.
Data Output Format
6.
X-Plane Settings
7. Important
Notes on Trim
7.1 Trim Indicator
Output Options
8.
Auto-Pilot Following
9.
User Guide Revisions
10.
CL Software Revisions
11.
Miscellaneous Settings
Appendix
A. Configuring the CL system for
"Potentiometer-less" operation (now the DEFAULT mode).
Appendix
B. Configuring electrical linking of dual
control stations.
Appendix
C. Configuring helicopter cyclic control
loading mode.
Appendix
D. Heavy Jet Mode 1
Appendix
E. Sim Avionics Mode
Appendix
F. Using with ProSim 737
Appendix
G. Failure Mode Loading
Appendix
H. Stick Pusher
Appendix
I. BFF Motorised Trim Wheel
Software Download
UPDATED -
V1.400 (Fully
unlocked version - DropBox link)
IMPORTANT - The
previous version of the On-Line User Guide (with references to the
old Setup Application) is
here.
If any of the above are not working you can use
this DropBox folder for downloads -
DROPBOX
Introduction
& Installation
IMPORTANT - The BFF Control Loader software operates with BLDRV
brushless motor driver cards in properly designed and built
simulator flight control systems. Before using the software please
ensure that your BLDRV drive system has been properly
set up and commissioned, and has been tested using the BFF Driver
Test application in accordance with the project instructions. For
details of the project documentation
see here, and for details of the
BLDRV cards see here.
The
BFF Control Loader software runs with MS FS9/X (also Lockheed
Martin® Prepar3D®) and X-Plane v10+.
The
BFF Control Loader V1.3+ software consists of two main applications.
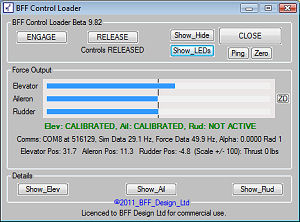
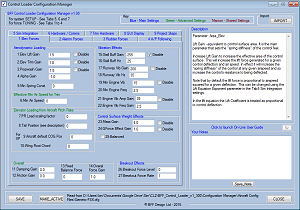
The Configuration Manager is used for system setup. BFF Control Loader
is the control loading driver software.
Installation
Installation is simply by unpacking the contents of the Zip package
into a dedicated folder on your PC. The software does not write any
values to registry, so to delete the software just delete the
installation folder. Run the programs from this folder, or create
shortcuts which point to the folder - DO NOT remove the files from
the folder to run them.
DO NOT
mix the files from new and old installs - always unzip the new
software into a new folder.
Existing users will notice the V1.3 release uses a new folder
structure. The new Configuration Manager has its own folder, and the
Driver Test app now has its own folder within the main CL software
folder.
The
aircraft .cfg files containing the control loading settings are now
in their own folder in the Configuration Manager sub-folder.
Upgrading?
If you are upgrading from a pre V1.3 version then do not mix the
configuration files of the new and old versions. Unzip the new version into its
own folder. Then run the Configuration Manager in the
new installation and use the IMPORT button to import the settings
from your previous installation.
This
will copy across your previous settings and update them for use with
the new software.
The
Import button will also work if you are upgrading from one V1.3
version to another.
FSUIPC &
XPUIPC
To use
with FS9/X or P3D, FSUIPC needs to be installed. Use the latest version
for the flight sim software you have and
follow carefully Pete Dowson's installation instructions. See
http://www.schiratti.com/dowson.html
To use with X-Plane, XPUIPC
v1.9.0 or later needs to be installed and the customised XPUIPC_offsets.cfg file
in the zip package should be copied to the X-Plane XPUIPC folder. Follow the instructions in
the XPUIPC documentation. See also section 6 for other
important information. See
http://www.tosi-online.de/XPUIPC/Home.html.
If you can't get to the
XPUIPC website here's DropBox links for XPUIPC -
V1.9 and
V2.0
NOTE for Windows 7 the
GUI text may not display properly if the desktop text size is set to
larger than the default 100%.
Contents
Next
|