|
DIY Flight Sim Projector
Articulation Mechanism |
Back to Page 1
Page 3
Articulation Mechanism
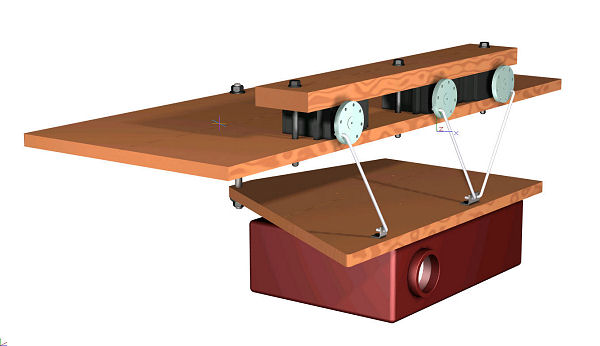
The projector articulation mechanism I opted
for is shown on the CAD image right (click image for bigger
picture). The projector is "ceiling" mounted to the
underside of a support plate which is pinned at the rear and
supported at the front by three tie rods. The tie rods form
a partial Stuart mechanism driven by the three RC Servos.
Controlled movement of the servos can induce vertical,
horizontal and tilt movements of the projector which are
reproduced and magnified at the projected image. As you can
see this particular mechanism is very simple and lends
itself well to DIY builds.
The required range of motion of the servos is
small and although I've used Hitec HS-515BB units I think
that servos with a smaller stroke but higher resolution
operating range could be an improvement as this would
contribute to further smoothness in the projector motion.
Although simple to build the mechanism must
be constructed with some precision to ensure that the
movements in the three degrees of freedom are clean and
largely uncoupled. The precision is achieved through
accurate positioning of the servos, ties rods and projector.
I've drafted a couple of engineering drawings
which show the mechanism assembly and part dimensions. The
pdf's are password protected and the password is:
Projector. If you are interested in trying this build
make sure to read the notes on the drawings carefully.
|
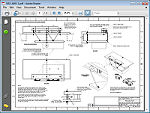
Mechanism Assembly
Drawing |
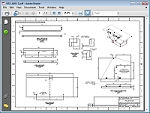
Mechanism Part
Details |
Servo Control
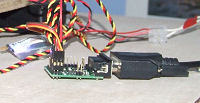 The
servos are driven from the V2 BFF Motion Driver through a
Pololu Servo Controller.
I've used both their 8 and 16 channel servo controllers with
satisfactory results. For details of the servo controller
wiring and how to connect the servos to the controller read
the User's Guide provided with the controller.
The
servos are driven from the V2 BFF Motion Driver through a
Pololu Servo Controller.
I've used both their 8 and 16 channel servo controllers with
satisfactory results. For details of the servo controller
wiring and how to connect the servos to the controller read
the User's Guide provided with the controller.
There are one or two important points to make here.
-
The servos should be connected to channels 1, 2 and 3 on
the controller if driven by the V2 Motion Driver. The Assembly drawing above shows how the
servos are numbered on the mechanism.
-
I powered the controller from a 12V battery using a
Dimension Engineering Sport BEC for the servo supply and
with a separate direct tap from the same battery for the
controller's logic supply.
-
The DTR/RTS reset enable jumper on the 8 channel
Pololu controller should be removed.
-
IMPORTANT - Use a 12V
battery dedicated to this system - do not tap into
batteries already used for driving a motion platform or
otherwise connected through motor controllers and
electronics to the same driving PC!
In operation the servos will audibly "chatter" as they
support and move the projector - if you fly with headphones
this will not be a problem.
Projector Motion Drive Software
 The
drive algorithms for the projector motion have been
incorporated into V2 of the BFF Motion Driver software. The
motion cues for the articulation mechanism are output on a
separate Serial COM channel from the main motion platform
cue output and can be used with or without the main drive as
is required. For operation of the BFF Motion Driver see the
driver web pages.
The
drive algorithms for the projector motion have been
incorporated into V2 of the BFF Motion Driver software. The
motion cues for the articulation mechanism are output on a
separate Serial COM channel from the main motion platform
cue output and can be used with or without the main drive as
is required. For operation of the BFF Motion Driver see the
driver web pages.
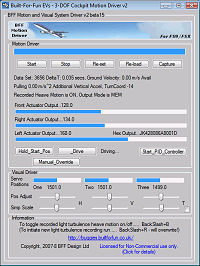
The status of the visual system cues are reported in the
driver window and adjustment sliders are provided for fine
position set up and for simple scaling of the projector
motion cues see below). The cues are customisable in much
more detail by adjusting parameters in a configuration file
- see the User Manual for more details.
The algorithms use live flight data extracted from the
flight sim to calculate horizontal, vertical and tilt
movements of the projected display. The motions are similar
in some respects to those found with the dynamic head
movements feature of MS FSX but they incorporate a number of
different parameters and, importantly, the system causes the
whole visual frame to move rather than causing head motion
just within a fixed visual frame. This is a key element of
the motion immersion effect.
The display horizontal movements are derived from the
lateral and yaw movement of the aircraft, display vertical
movement is derived from heave and pitch motion and tilt
from aircraft roll. For use with FSX I find that it is best
to disable the head movement within the sim with the
exception of a reduced amount of fore/aft acceleration
effect. The driver will work with FS9 also and I'm currently
working on an X-Plane version.
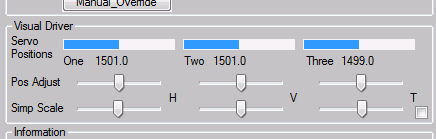 To
get the system operating the output COM port is set in the
config file and the servo controller connected to the COM port
on the driver PC. The servo motion cues become active once the
Motion Driver is running and switched to "Drive" mode. The
sliders can be used to make fine adjustments of the display
position and to apply simple scaling to the movement magnitudes
- more detailed manipulation of the cues (say to sharpness of
response, saturation/cutoff levels etc) is done by altering the
config file parameters.
To
get the system operating the output COM port is set in the
config file and the servo controller connected to the COM port
on the driver PC. The servo motion cues become active once the
Motion Driver is running and switched to "Drive" mode. The
sliders can be used to make fine adjustments of the display
position and to apply simple scaling to the movement magnitudes
- more detailed manipulation of the cues (say to sharpness of
response, saturation/cutoff levels etc) is done by altering the
config file parameters.
Possible Uses in DIY Rigs
I am currently using the projector articulation
system with the motion Platform 3 which has a single projector
display. I think it would be also worth experimenting with as an
enhancement to simple fixed desktop flight sim setups which use
a single projector to display the main screen against a wall or
screen. Other combinations of projector setups, say with mirrors
or in different orientations should also be possible. I think
this is a really interesting technique that could add
interesting motion effects at fairly low cost to a number of
flight sim set ups.
If you do have a shot at implementing the method
do let me know how you get on. The motion driver is in the early
stages of it's use and I can consider improvements and
additional features if needed - for example to drive other than
Pololu servo controllers.
Back to Page 1
Page 3
© This site is
copyrighted, If you'd like more information or have any
comments please contact me at
Page Published
22nd December 2008